Saturday 30 September 2017

Americana Gel Stains

I am doing a bit of procrastinating right now and choosing not to start on the third and final floor of Dalton House.  Partly because I don't want to finish it and then have to decide whether to go on to another project or not!!!! and partly because I haven't actually come up with a decent set of plans for this loft apartment.  As in real life, with these sort of loft conversions, I am trying to squeeze a quart into a pint pot.

So, for now, I want to make up some more furniture kits for various places in the house.


I am always pretty unhappy about the final finish on these things.  In an effort to improve this, I thought I would have a go with something other than my usual traditional spirit based wood-stain followed by polyurethane varnish.


I came across Gel stains looking through a Minwax site.  I wish we could get Minwax products (full range and right price) in the UK.  Anyway, having spotted gel stains, I did some reading up on them and began to wonder if this was the way forward.


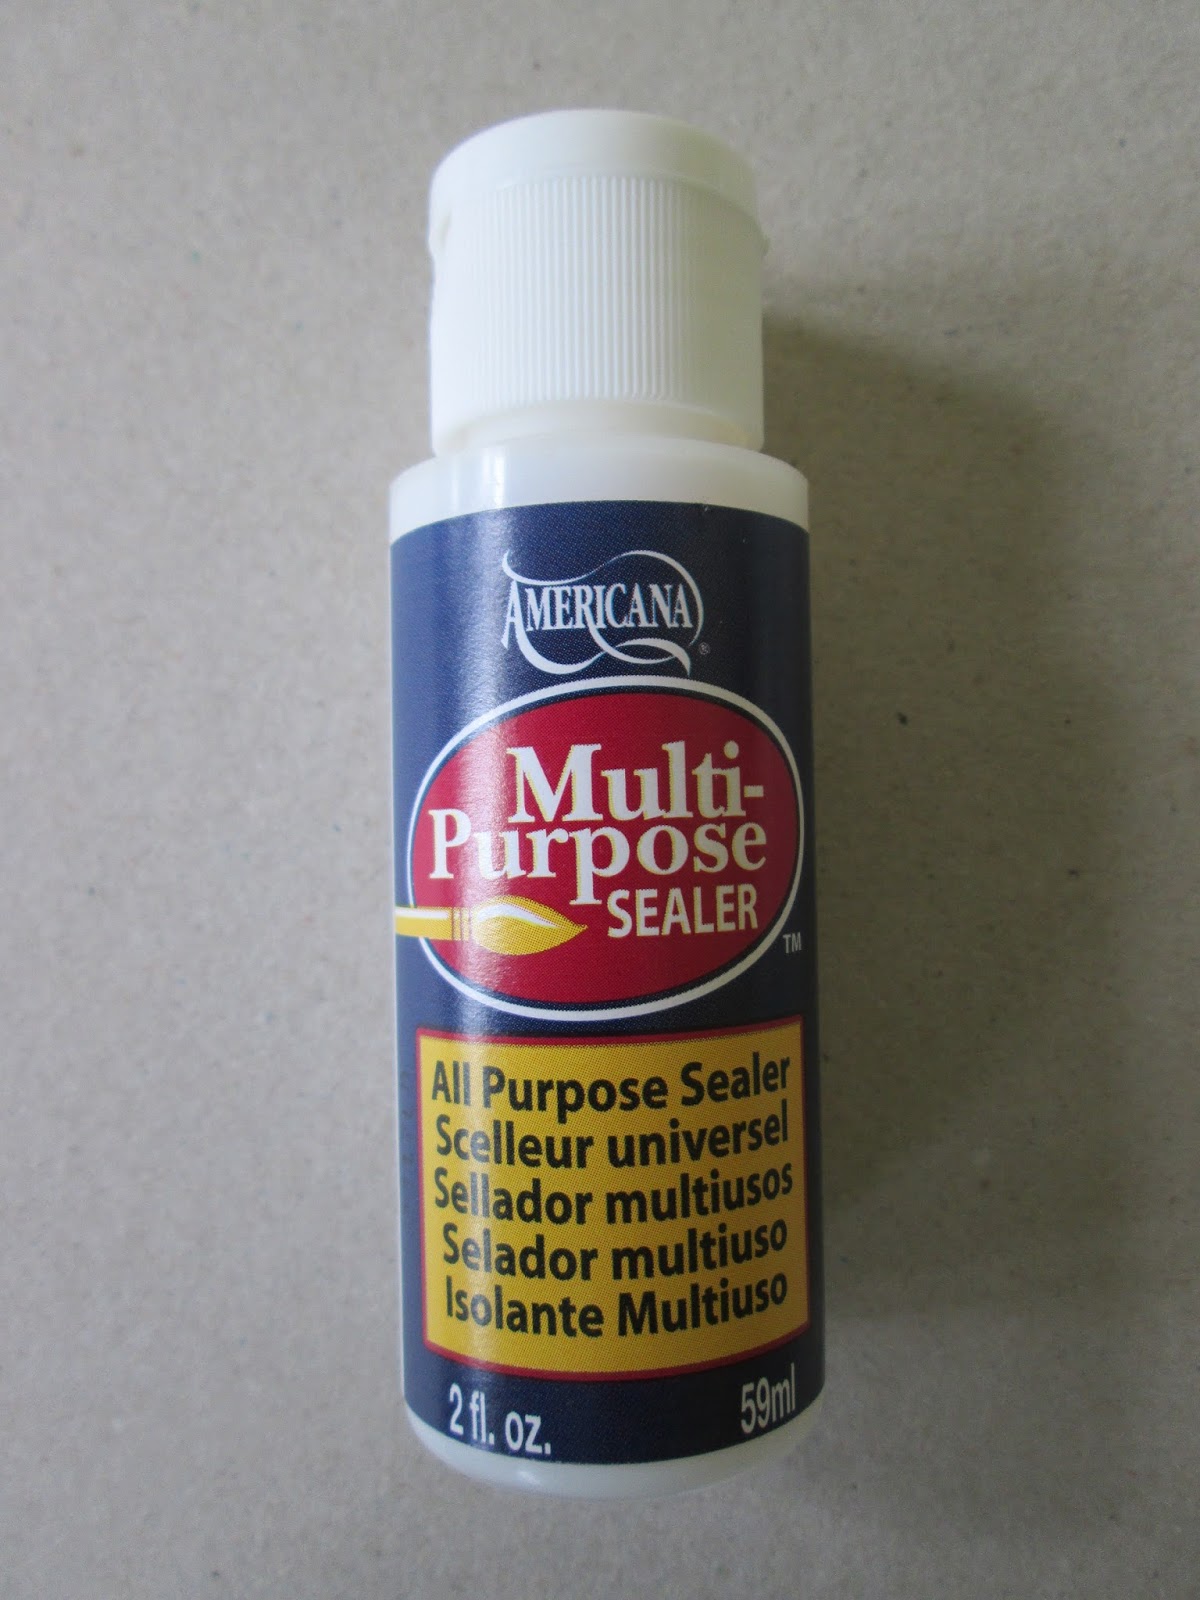
Like most paints/stains these days they come in spirit based and water based versions.  I always opt for water-based 
for easy clean up.  Some would argue water-based is not the way to go when dealing with wood.  I find water-based or spirit-based wood will always need denibbing and can warp if it has a tendency to do that which ever is applied.  I didn't want the usual pint or more (from DIY stores) for a few teeny furniture items.  Happily I managed to find small pots (2 oz?) made by Americana.  I already have some of their acrylic paints and they seem fine, so it was worth a punt.


In the UK I could only get three colours and even that required a bit of a search.  They came from someone called Buddly Crafts.  Totally unknown to me but the price was fine (£2.49 plus VAT)   Three bottles plus postage came to £10.49 - not exactly small beer but a long term solution if they work.
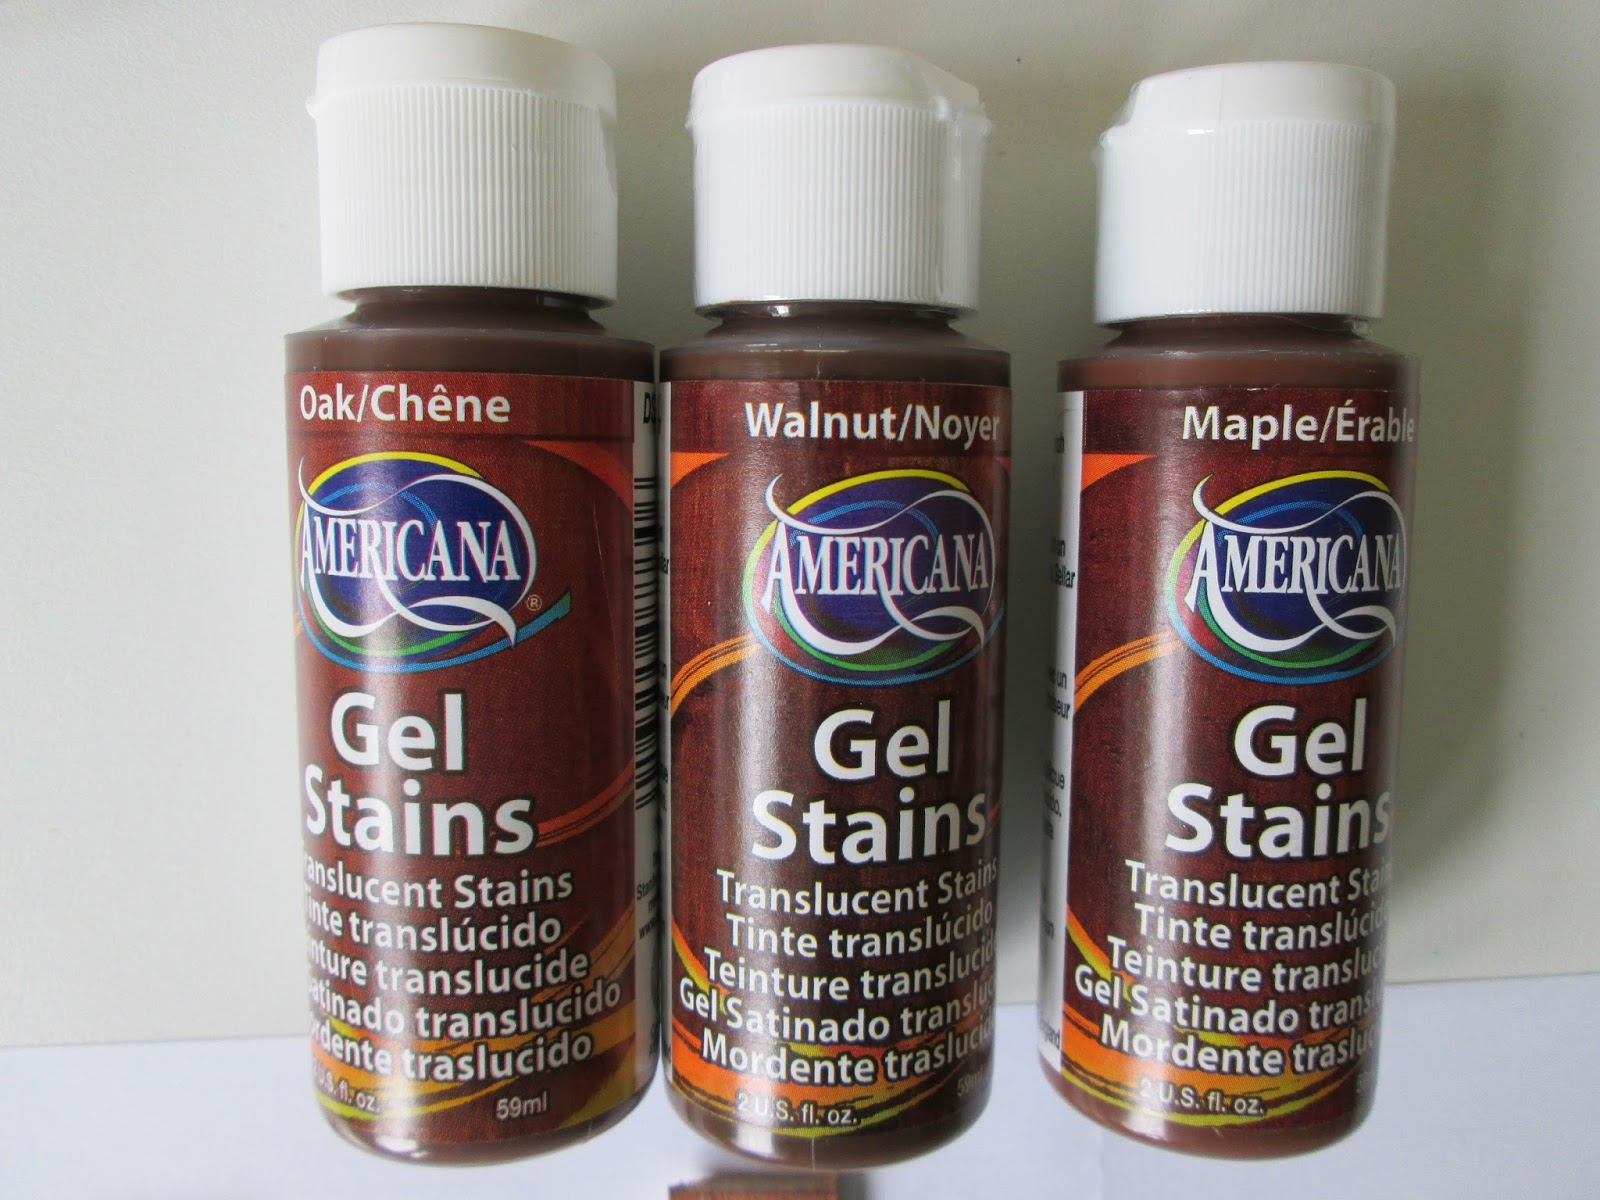


fingers crossed


left to right - oak, walnut, maple
I rummaged out some off-cuts from skirting and the experiment began with trying to ascertain how many coats I would need to get a decent finish.


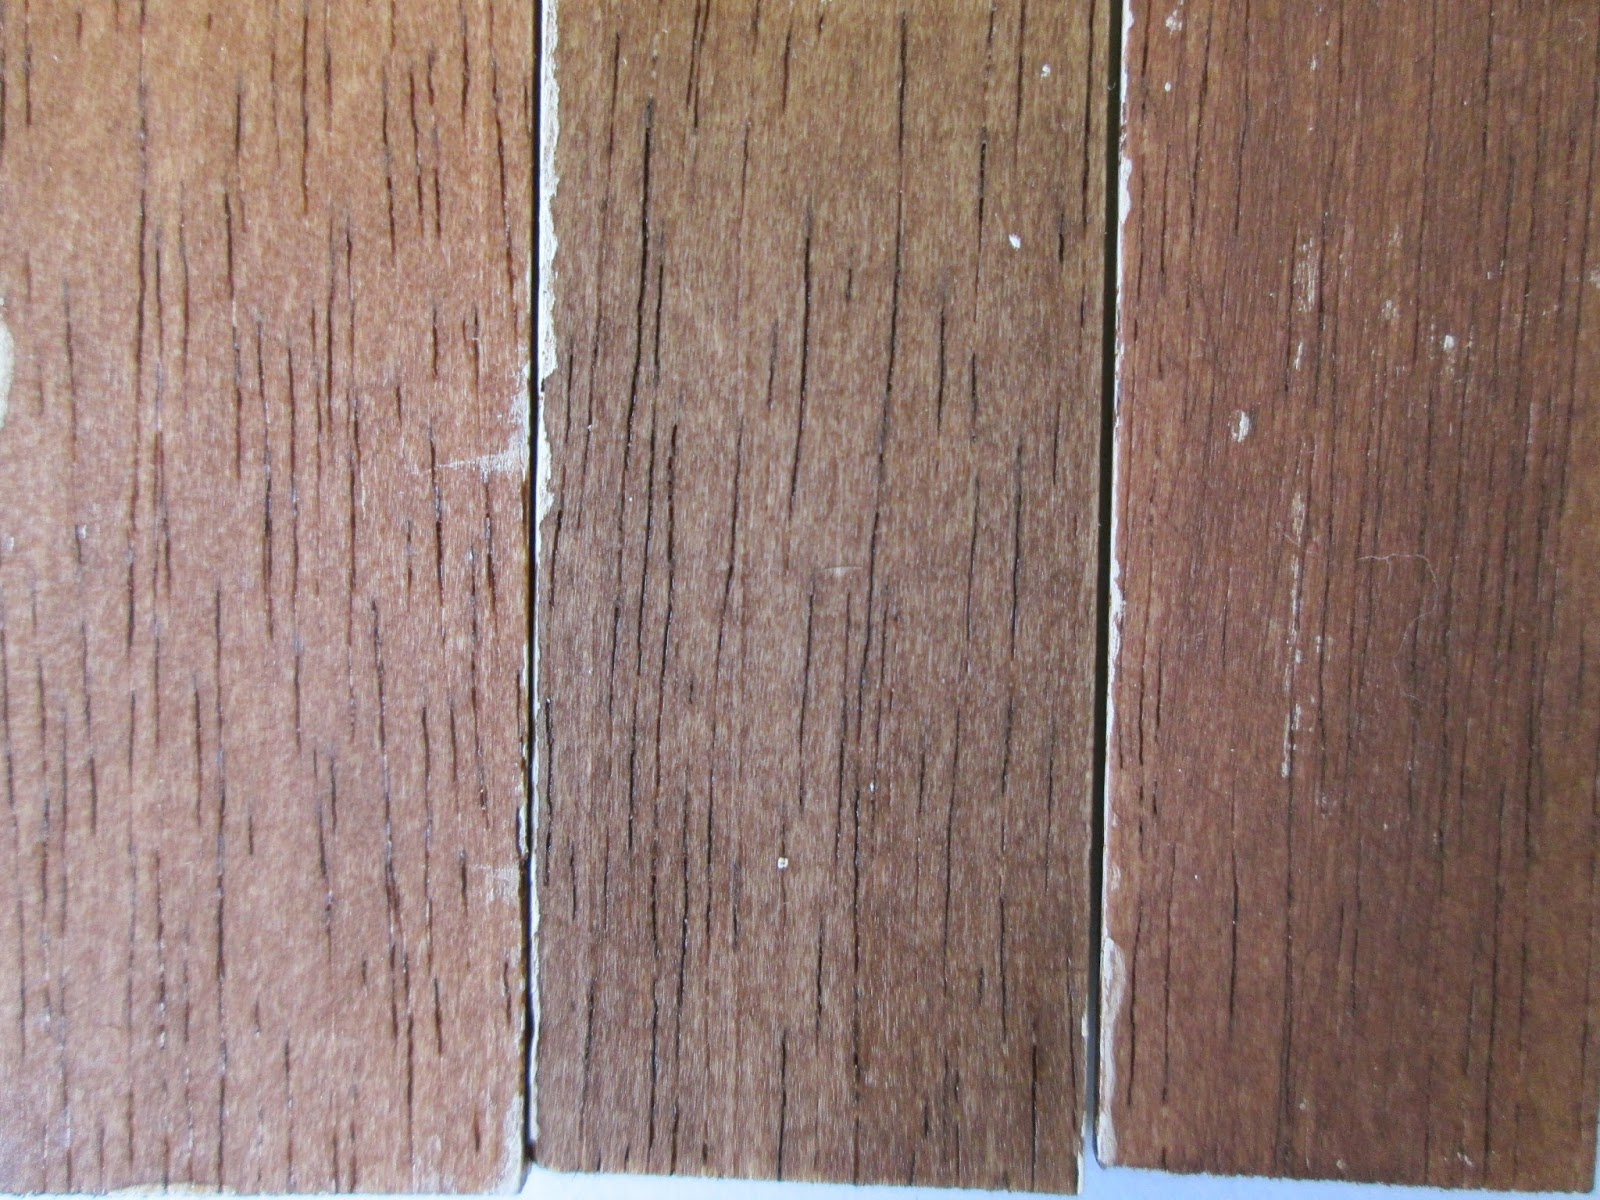
Looks like it needs three.  It is easy and quick to do if you cheat and don't wait long enough between coats!!  Paint on with a brush just as you would any other paint and wipe off the excess.  You should then allow an hour before adding the next coat.....needless to say my hour measured about ten minutes.  I decided when it didn't feel tacky any more that would be fine.

You can see there is a real difference on each layer.


They were lovely to use, much easier that nasty old smelly spirit-based wood-stain.  They seem to have a pigment which sits more on top of the wood than actually soaking in so they feel like a cross between a paint and a stain.  They have a more even coverage than ordinary stain and went on easily with a small brush.


After three coats they dry to a very slight sheen but they did look as though they needed a bit more of a glow. You might get away with waxing it but I am too lazy to go there.


I then wondered which varnish to apply.  I usually use a water based satin varnish from B & Q but decided to stay in the realm of little bottles. I had these bottles in my drawer - brought home from the States and my brief affair with quarter scale!


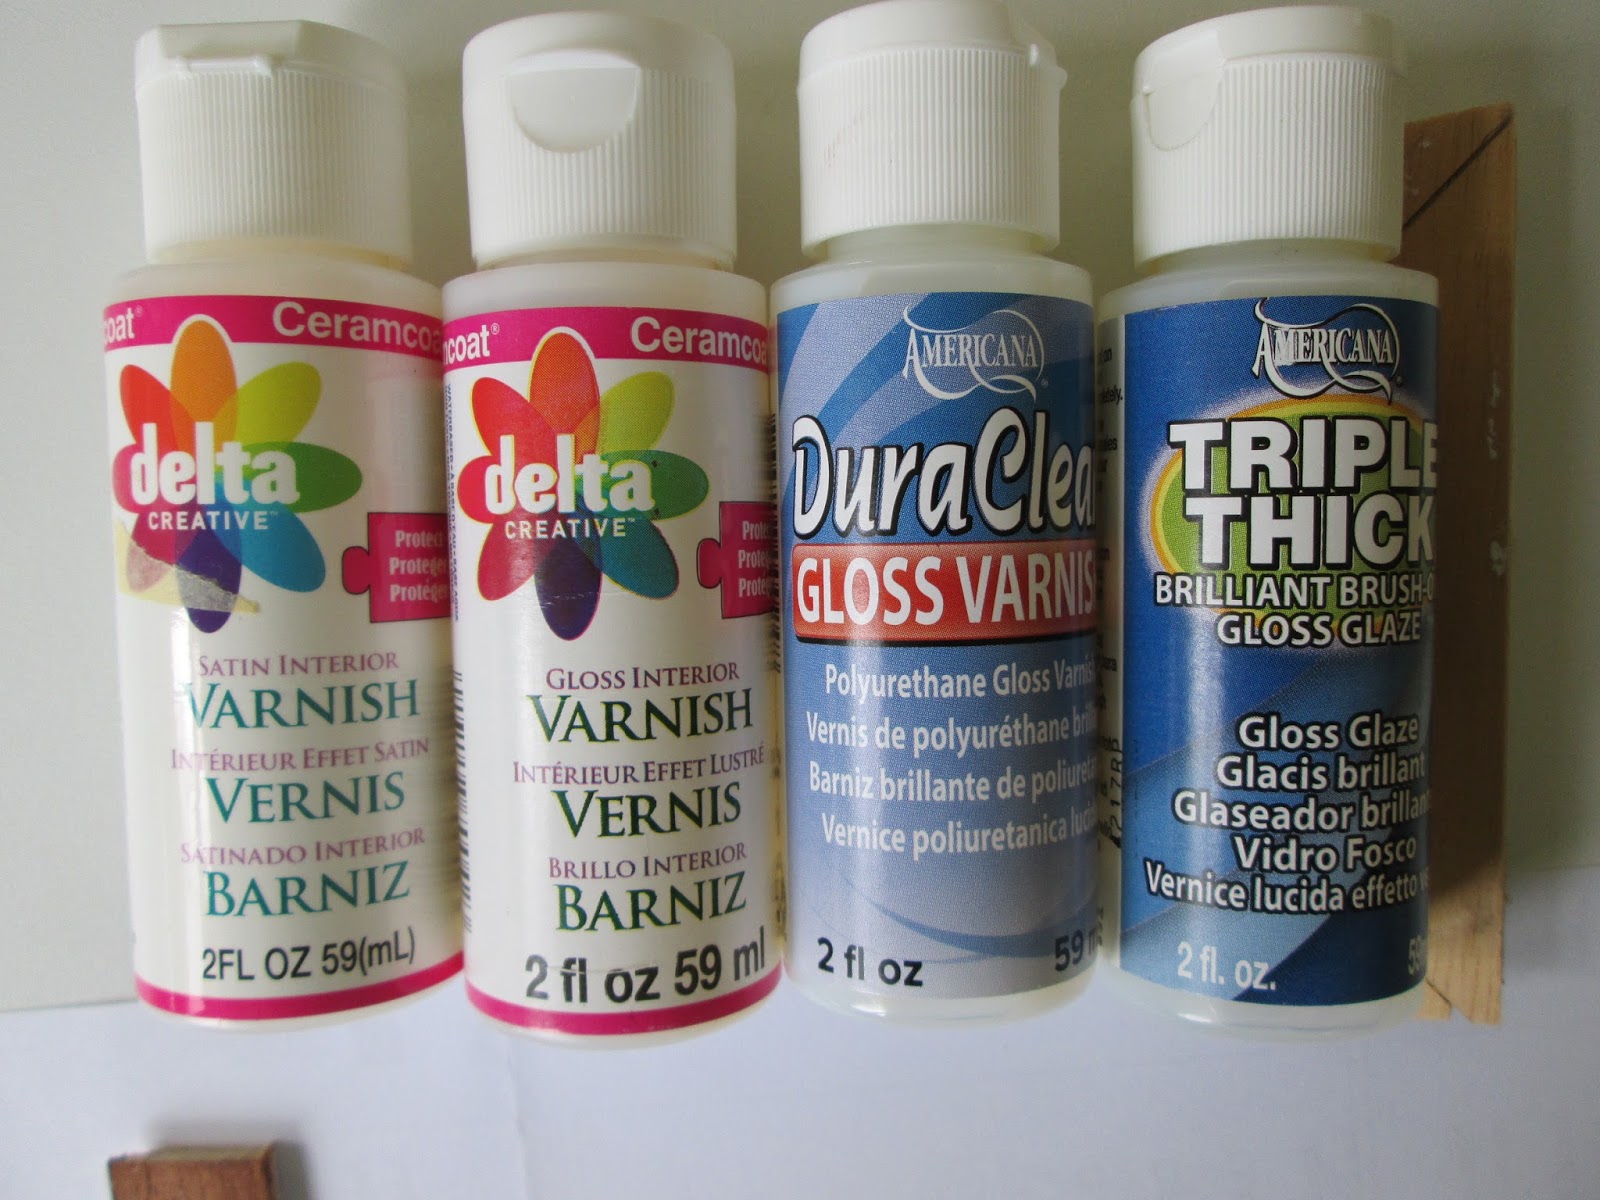
ignore the triple thick one
 In the photo below I doubt you can see any difference between the gloss on the left side of the stain and the satin on the right side of the stain.  Even in real life it is pretty subtle other than the gloss didn't go on as easily as the satin and would need a rub down and another coat.  I did this after the photo was taken, but the difference is so infinitesimal its not worth showing you.


left side gloss, right side satin
After this I also did a bit of a naughty and tipped all three bottles into a small glass jar so now I don't actually have a satin or a gloss.  I assume I now have a glatin? or a sloss? - it will be fine.  Basically I think they are all the same animal - the satin being thinned down and very runny and the gloss more 'condensed' and a bit gloppy to apply.

I am very tempted to do the same with the three wood stains**.  There is only the subtlest difference in the colours and I am already faffing about which one to choose.


The real point of all this is that I am trying to find a way of staining wooden kits and get a decent even finish  However, what you can see clearly on this test is that the nasty effect you get applying stain to poor quality wood, namely flecks, is still happening.

Having read this, I may have a solution: 

'When using on wood, you can mix 25% Multi-Purpose Sealer with 75% Americana Gel Stain to seal and stain at the same time.'

 I have sent for the Multi-Purpose sealer so watch this space.


(20/08/17)


** Yup, I mixed them up too - all together in a glass jar. ----------------------------------------------------------------------------------------------------------------------

Here it is:


 In real world you can buy all sorts of wood sealers but as usual you gets far too much of the stuff for us mini folk.  It seemed sensible to give this teeny one a go.   Made by Americana again and, in this case, sold by Country Crafts.  This is another new to me vendor and the service was fine and gets a good rating on Facebook.


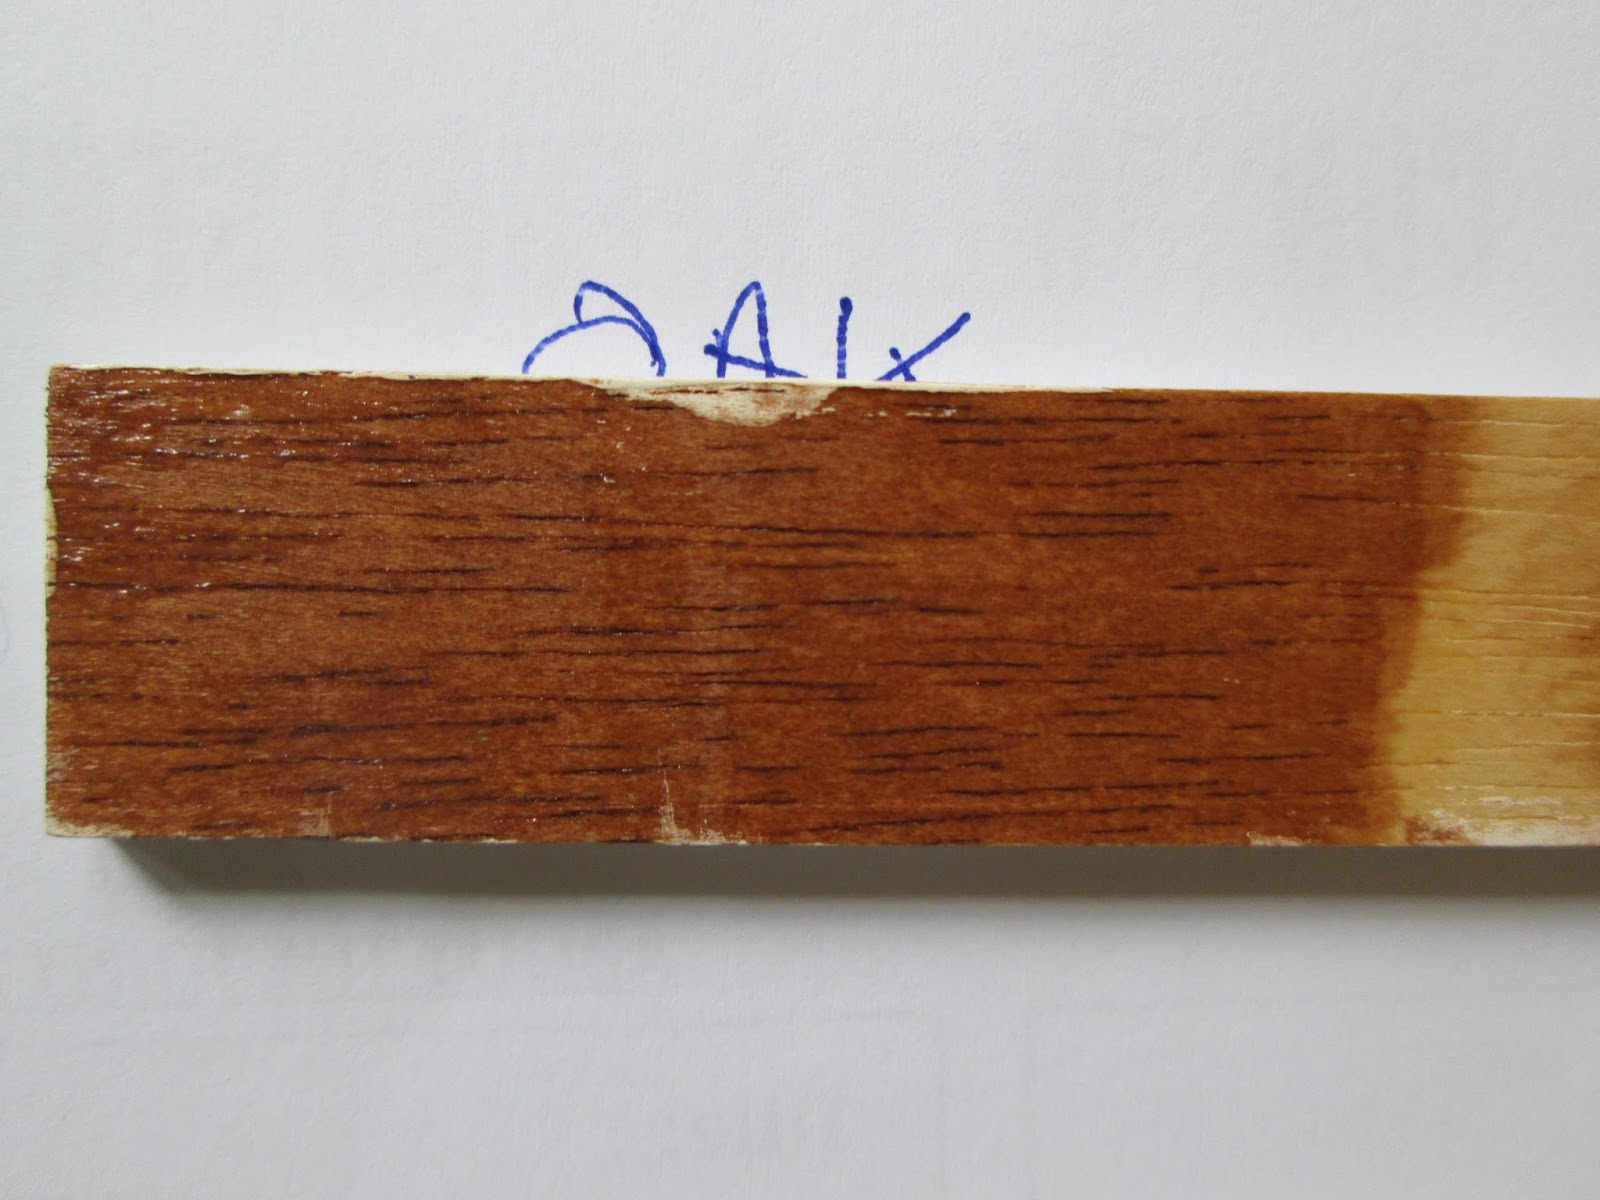
OK:  a site I saw this on said mix 25:75 sealer and stain.  The bottle says mix 50:50 - so going with the bottle instructions,  I duly mixed fifty/fifty.  Starting at A (the right way up)  you are looking at one, two and then three coats of this mix.

I still had flecks so thought I would try applying the sealer first and then three coats of stain.  You can see the result of that on the small left-hand upside-down section of the trim.  Still flecky.


The top piece of wood shows the three coats I did before I got the sealer and the strip below is three coats of fifty/fifty stain and sealer.  It has finished up a much lighter shade so the sealer must be working in some way.  Just not the way I want.


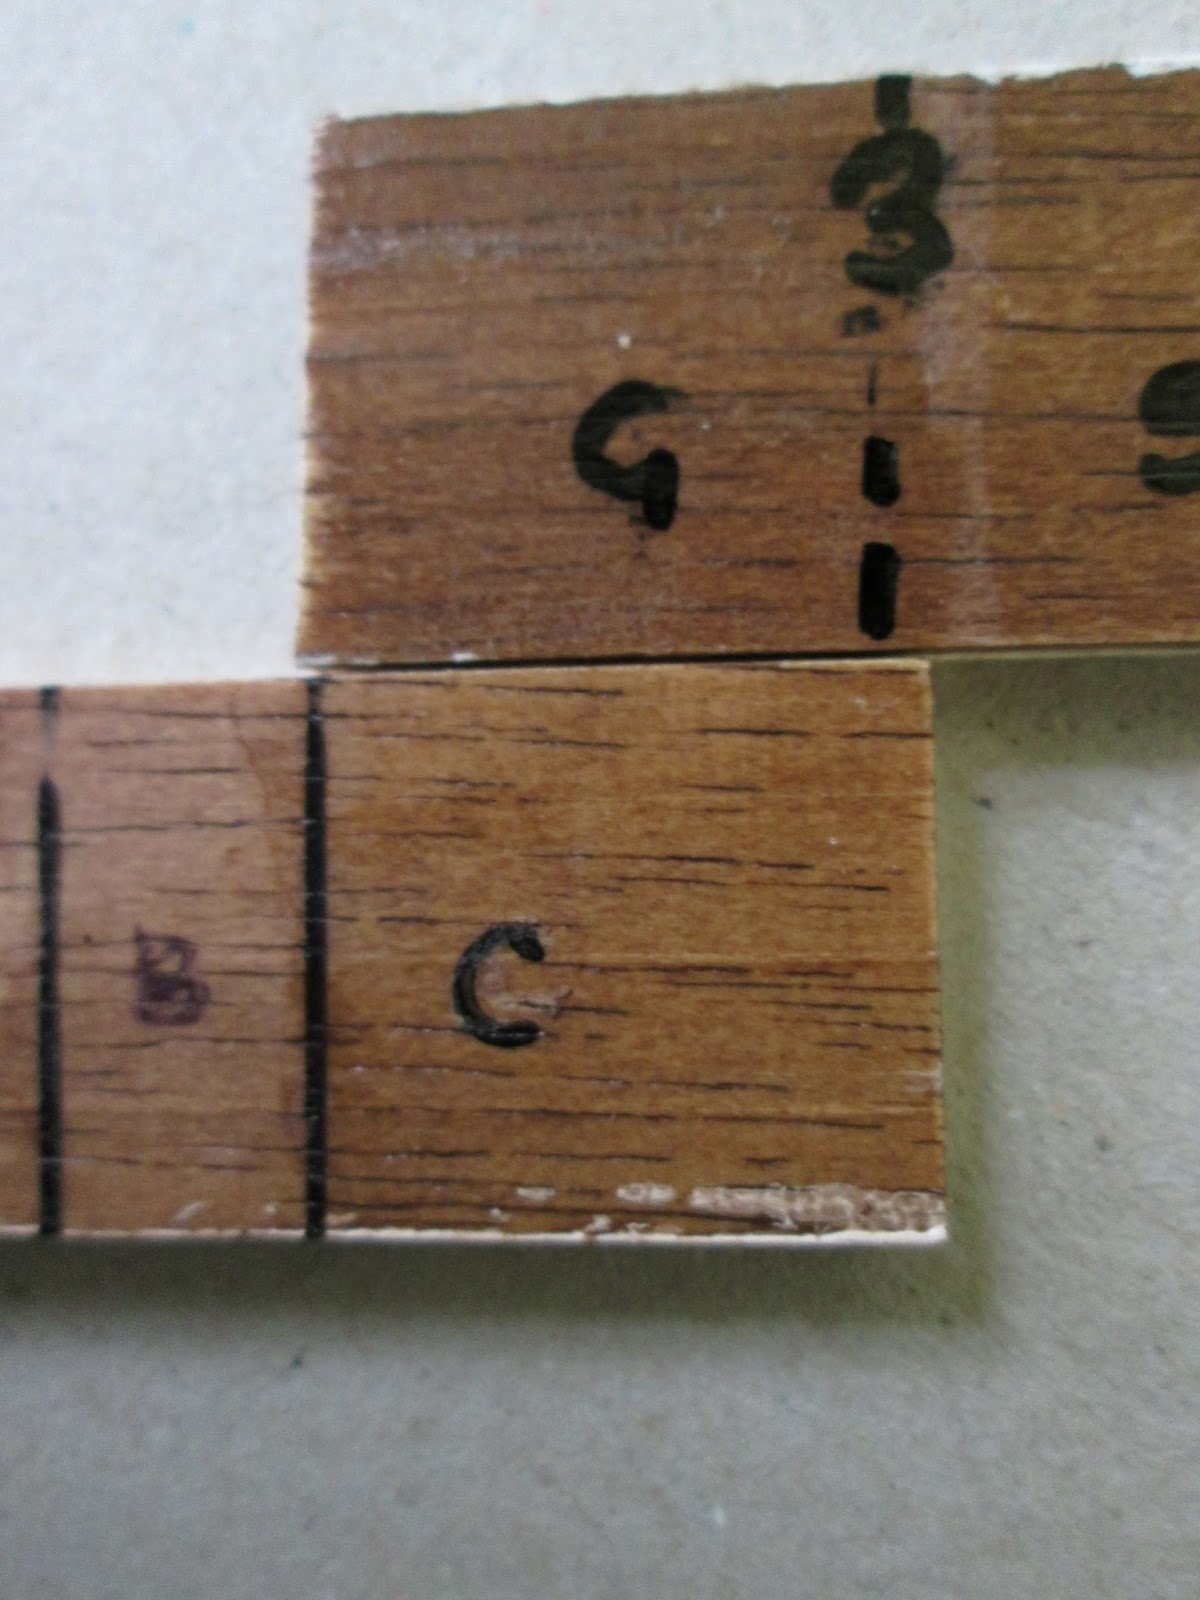
Again, the top piece of wood shows the three coats of stain without any sealer and the strip below shows where the sealer was applied first and then three coats of stain added.  Again, this is lighter than the no sealer piece and, again, is still flecky.

Conclusion:   

  • If you are still awake, all I can say is there doesn't seem much point to the sealer either applied before or mixed in with the gel stain before coating.  Most importantly none of them with or without sealer seem to help with the flecky finish that I am particularly trying to avoid.


  • However, the gel stain is as good as..... or as bad as......the more usual spirit based wood stain in terms of coverage but it goes on easier and cleaner and clean up after is easier.  So, I am very happy to use the gel stain.  I will probably also use the sealer (as I have bought it!) and I quite like the lighter finish.


This will be miles more interesting when I get to make some actual furniture and see what happens on that wood.


(28/08/17)


Saturday 23 September 2017

Hanging Art Work (mirrors etc)


I mentioned a while ago I had real life notes on hanging art work in a house and that I found them really useful.  It took a while to find them as I now know them by heart having moved through many home incarnations and so I have not had to look at them for a while.  Finally they emerged, so here they are.  As always pretty much anything you find in big world can be transcribed down to minis - hope this is a useful memo for you too.


Saturday 16 September 2017

Making Books - updated version!!

I have finished making the books for the library and thought I would share how I got the process down to a fine art.  This instruction is for making books en masse just for filling shelves.  They will not be especially lovely and won't have turning pages; they are just library eye candy.

First I found free printies as before** and printed them up and 'glazed' them with matt Mod Podge.  No need to do this step, or you can choose to glaze them with your 'shine' of choice.  Leave until bone dry and cut out carefully.  Take it slowly - use scissors or knife whichever gives you the best result.  I find a very sharp knife gives me more accurate cuts than scissors.


By far, the easiest filling for books is balsa wood.  Ideally you want one inch wide strips in two thicknesses.  I used 3/16" thick piece and 1/4" thick piece.  I could only find three inch wide strips so I certainly bought overkill. I only needed one 5/8" wide strip of each piece to make 84 books so I still have a lot of wood left over.


I cut a 5/8" strips along the length of the wood - this is very easy as it is cutting with the grain.  I then rounded off one of the edges - I think this really matters.  I made up a book without the edges knocked off to see if I could miss this step out and it looked distinctly odd with a squared off spine.  This knocking of the edges with one of the nail buffers I've mentioned before literally only takes seconds to do.

At this stage you could now glue on your covers, wrapping them round the curved edge then cut each one free.  I do a slightly more fiddly version because I like the 'pages' to sit slightly inside the cover (top and bottom) as they do with a real book.


Here's the total 'kit' ready to go.  Use any glue you like - I found cheap old school glue is fine.  Use a fine bladed knife.  Don't use a box cutter/Stanley knife they tend to crush balsa as they cut - the blade is a lot thicker than a craft knife blade.  You also need the wood strip - obviously - and something thin and round to help pre-shape the cover - a thin paintbrush handle, kitting needle - whatever.


The width of most of my books was a little over 3/8" so I laid the balsa strip down and marked up where to cut, spacing 3/8" apart.  I did find I struggled a bit more cutting the thicker piece of balsa, but I really do lack wrist strength so I am sure a knife will do the job for almost everyone but, that said, it cut like a knife through butter using a saw.  I stood the strip upright and sawed downwards through it.


With the wood all cut, I rolled the cover back and forth a little round the 'shaper' to get a nice curved spine to fit the wood - you can probably skip this step without tragedy.


I then applied a little glue, not especially carefully nor up to the edges


I placed the spine where it needed to go ....


....wrapped the sides round and pressed them firmly in place.  Often there would be a small bit of the wood showing - all my printies varied quite a bit in the depth of the book.  


 This was dead easy to trim off with the knife as it was cutting with the grain.


Et voila... we have a book...


Very soon we have a lot of books.  I glued some sets of books together and then just mixed the others and glued them into fives to make them easier to stack on the shelves.


I think these quick and cheap books look great on the shelves and I will take a break for a while from making them as I am hoping to get a lot of interesting objects to fill the remaining spaces. The whole lot was only two 'afternoons' work.  My 'afternoon' being a couple of hours or so.


** Tree Feathers is a really nice free printie site but if you google 'free printies miniatures' there are a ton of them out there.


(22/06/17)

Saturday 9 September 2017

Recessed lights in library


I finally plucked up courage to do a new kind of lighting.  I wanted to put some recessed lights in the library. 

First you need the narrative for this library before you think it is set in 1750.  This house is a Georgian house but being seen in 2016.  This small library would have been a service room in the original house but is now being used as a climate controlled space to take care of some valuable old texts.


air conditioning/temperature/humidity control unit in the ceiling

The lighting needed to be low (ish) cool lighting, hence my desire for recessed lights (aka down-lighters or can lights).  

The LEDs came from Elf Miniatures

The idea was to make holes the size of the eyelets and tap them in place (or glue if needed).  Then insert the LED light and bend it at the neck in the position I wanted.  After deciding where to put the bend, I slid the heat shrink tubing up to the neck and heated it. .  

I should have then laid the wires in grooves to exit the house as I normally do.  Right now they are just lying on the floor above.  I am hoping for once to get away with not having to make six grooves to the back of the room - no easy way of doing this and I will always duck actual work if I can.  The room above will be the only one in the house with fitted carpet and I am hoping that might be kind enough to go down on some cardboard false floor on 'joists' and not mind the wires??????  More of that when I get to it.


First step was to make my usual template.  I do realise all the marking and measurements that I labour to put down on paper could simply be done directly on the floor above the library but (a)  I am now working with a stool to reach that floor which isn't great ......


.........and (b) I like to see where the lights will go in relationship to objects in the room.  I can then position furniture to check out the usefulness of the light(s) and basically just get a better feel of how they will look in relationship to the finished room.  So I make a template for the floor of the room the lights will go in (the library).  I then mark up where the lights will go.


deciding where I want the lights and making the template

The template is then taken to the floor above and fastened down with tacky wax or masking tape so it doesn't move around and I drill through the marks.  This time using a larger drill bit than usual as I was making holes for the eyelets not just the usual wires.


drilling the holes
 I actually managed to guess the right size drill bit which was a brilliant tight fit for the eyelets so no glue was needed


no glue needed

I simply tapped them in place with a small hammer using a scrap of wood to protect the eyelet and the ceiling paint.


I got these LEDs from the terrific  ELF along with some steel eyelets but, being awkward, I wanted white so I searched the web and got some that way.  These are 5/32" eyelets: you will need that size to get the LED inside the neck of it plus they are in scale for most real ones, although recessed lights can, of course, come in all sorts of sizes.  

If you extend the bulb slightly from the eyelet it will give a wide spread of light.  I wanted mine subdued and decidedly recessed so I fiddled around with them for a while using a bit of wood and making a mock up to help me decide just how far in (or out) I wanted the bulbs to be.  Eventually they ended up completely inside the eyelet.  I didn't like how the very bright LED light caught your eye when any of the bulb was visible.  I thought that with six of those glowing at me in the library I wouldn't have looked at anything else.  You can get warm lights rather than bright so that might tone them down and I do know folk who simply paint over them to calm them down.


Unlike the usual dolls house lighting these LEDs have polarity.  It doesn't make for a problem when I come to wire them into the power strip as it is clearly marked with a plus and minus.  All that will be revealed very, very much further down the line when the whole house is wired.

The idea here is that much of the very utilitarian shelving was already in the room as it would have been a service room for the 'public rooms' on this floor and would have housed dishes and silver and all kinds of things that needed to be set out for different functions.  My Dalton House resident, another Elizabeth, had it re-positioned and repainted in its original colour (the same colour as the original linen press in the basement) so that there was still a nod to the 'old house'.  No-one actually works in this room but there is a desk and couple of chairs in case any visitors would like to look at something in her collection.


not at all finished but on the way


(29/05/17)

Saturday 2 September 2017

Just tweaking

Nothing is so good that it can't be improved.

Interior door knobs


I posted ages ago about being peeved about door knobs and not being thrilled with the plain brass kind for the music room and library.  I managed to find ones I liked better and decided to do a swap.


For any door knob I do look for ones that are connected with a little threaded rod so even these plain, rather too large ones, were easy enough to remove and switch to something I like better.


unscrew the old

I held the finger plates for the new ones in place and marked up where I needed to put black ink to simulate a keyhole.  I already had holes for the rod of course so no drilling was needed.


mark up the keyhole and colour in a black area


 Then it was just a simple job of adding a couple of touches of superglue for the plates and screwing together the new knobs.


Large rug needed
Also a while ago I showed you how I had joined two rugs together to make a larger rug for the music room and I was reasonably pleased with the end result.  When I got it out again I saw how it could be improved on.


The white edges shouted out against the wood floor, especially as there was no white in the pattern of the rug itself.


so white


All it took to remedy this was a black permanent ink Sharpie pen .....


new black edges

 .........and a couple of minutes 'colouring in'.


half done, doesn't the black edge look better?


(24/05/17)